> ## Documentation Index
> Fetch the complete documentation index at: https://dripart-chore-sync-comfy-api-v2-spec-2b9c2cf.mintlify.site/llms.txt
> Use this file to discover all available pages before exploring further.
# ByteDance USO ComfyUI Native Workflow example
> Unified Style and Subject-Driven Generation with ByteDance's USO model
**USO (Unified Style-Subject Optimized)** is a model developed by ByteDance's UXO Team that unifies style-driven and subject-driven generation tasks.
Built on FLUX.1-dev architecture, the model achieves both style similarity and subject consistency through disentangled learning and style reward learning (SRL).
USO supports three main approaches:
* **Subject-Driven**: Place subjects into new scenes while maintaining identity consistency
* **Style-Driven**: Apply artistic styles to new content based on reference images
* **Combined**: Use both subject and style references simultaneously
**Related Links**
* [Project Page](https://bytedance.github.io/USO/)
* [GitHub](https://github.com/bytedance/USO)
* [Model Weights](https://huggingface.co/bytedance-research/USO)
## ByteDance USO ComfyUI Native Workflow
Make sure your ComfyUI is updated.
* [Download ComfyUI](https://www.comfy.org/download)
* [Update Guide](/installation/update_comfyui)
Workflows in this guide can be found in the [Workflow Templates](/interface/features/template).
If you can't find them in the template, your ComfyUI may be outdated.
If nodes are missing when loading a workflow, possible reasons:
1. You are not using the latest ComfyUI version (Nightly version)
2. Some nodes failed to import at startup
* [Cloud](https://cloud.comfy.org) will update after ComfyUI stable release.
So, if you find any core node missing in this document, it might be because the new core nodes have not yet been released in the latest stable version. Please wait for the next stable release.
Flux.1 Dev USO Reference Image Generation
Use reference images to control both style and subject. Keep your character's face while changing artistic style, or apply artistic styles to new scenes.
 Run this workflow on Comfy Cloud
Download the workflow JSON and drag it into ComfyUI
**Input materials**
Upload this file to the matching `LoadImage` node:
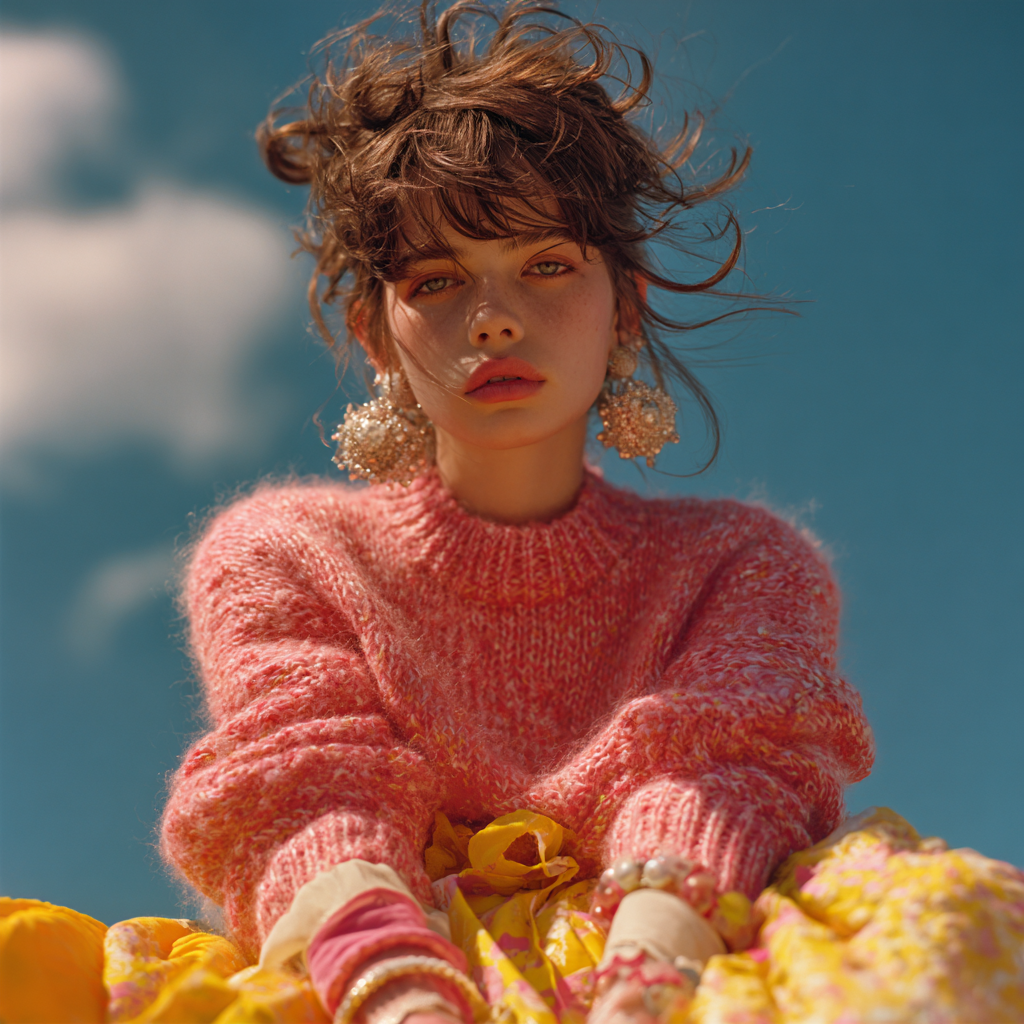
`LoadImage` node 47 · `flux1_dev_uso_reference_image_gen_input_image.png`
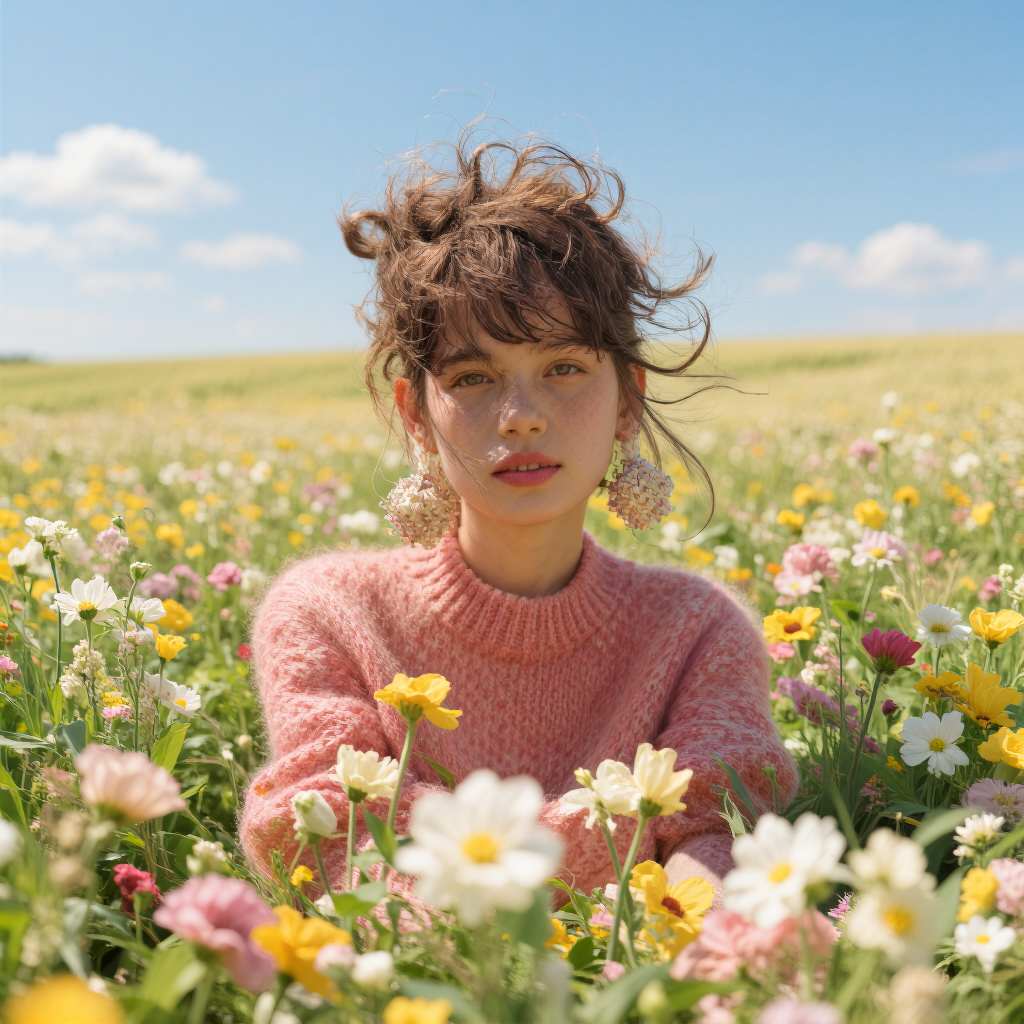
**Example output**
### 1. Workflow and input
### 2. Model links
**checkpoints**
* [flux1-dev-fp8.safetensors](https://huggingface.co/Comfy-Org/flux1-dev/blob/main/flux1-dev-fp8.safetensors)
**loras**
* [uso-flux1-dit-lora-v1.safetensors](https://huggingface.co/Comfy-Org/USO_1.0_Repackaged/blob/main/split_files/loras/uso-flux1-dit-lora-v1.safetensors)
**model\_patches**
* [uso-flux1-projector-v1.safetensors](https://huggingface.co/Comfy-Org/USO_1.0_Repackaged/blob/main/split_files/model_patches/uso-flux1-projector-v1.safetensors)
**clip\_visions**
* [sigclip\_vision\_patch14\_384.safetensors](https://huggingface.co/Comfy-Org/sigclip_vision_384/blob/main/sigclip_vision_patch14_384.safetensors)
Please download all models and place them in the following directories:
```
📂 ComfyUI/
├── 📂 models/
│ ├── 📂 checkpoints/
│ │ └── flux1-dev-fp8.safetensors
│ ├── 📂 loras/
│ │ └── uso-flux1-dit-lora-v1.safetensors
│ ├── 📂 model_patches/
│ │ └── uso-flux1-projector-v1.safetensors
│ ├── 📂 clip_visions/
│ │ └── sigclip_vision_patch14_384.safetensors
```
### 3. Workflow instructions
Run this workflow on Comfy Cloud
Download the workflow JSON and drag it into ComfyUI
**Input materials**
Upload this file to the matching `LoadImage` node:
`LoadImage` node 47 · `flux1_dev_uso_reference_image_gen_input_image.png`
**Example output**
### 1. Workflow and input
### 2. Model links
**checkpoints**
* [flux1-dev-fp8.safetensors](https://huggingface.co/Comfy-Org/flux1-dev/blob/main/flux1-dev-fp8.safetensors)
**loras**
* [uso-flux1-dit-lora-v1.safetensors](https://huggingface.co/Comfy-Org/USO_1.0_Repackaged/blob/main/split_files/loras/uso-flux1-dit-lora-v1.safetensors)
**model\_patches**
* [uso-flux1-projector-v1.safetensors](https://huggingface.co/Comfy-Org/USO_1.0_Repackaged/blob/main/split_files/model_patches/uso-flux1-projector-v1.safetensors)
**clip\_visions**
* [sigclip\_vision\_patch14\_384.safetensors](https://huggingface.co/Comfy-Org/sigclip_vision_384/blob/main/sigclip_vision_patch14_384.safetensors)
Please download all models and place them in the following directories:
```
📂 ComfyUI/
├── 📂 models/
│ ├── 📂 checkpoints/
│ │ └── flux1-dev-fp8.safetensors
│ ├── 📂 loras/
│ │ └── uso-flux1-dit-lora-v1.safetensors
│ ├── 📂 model_patches/
│ │ └── uso-flux1-projector-v1.safetensors
│ ├── 📂 clip_visions/
│ │ └── sigclip_vision_patch14_384.safetensors
```
### 3. Workflow instructions
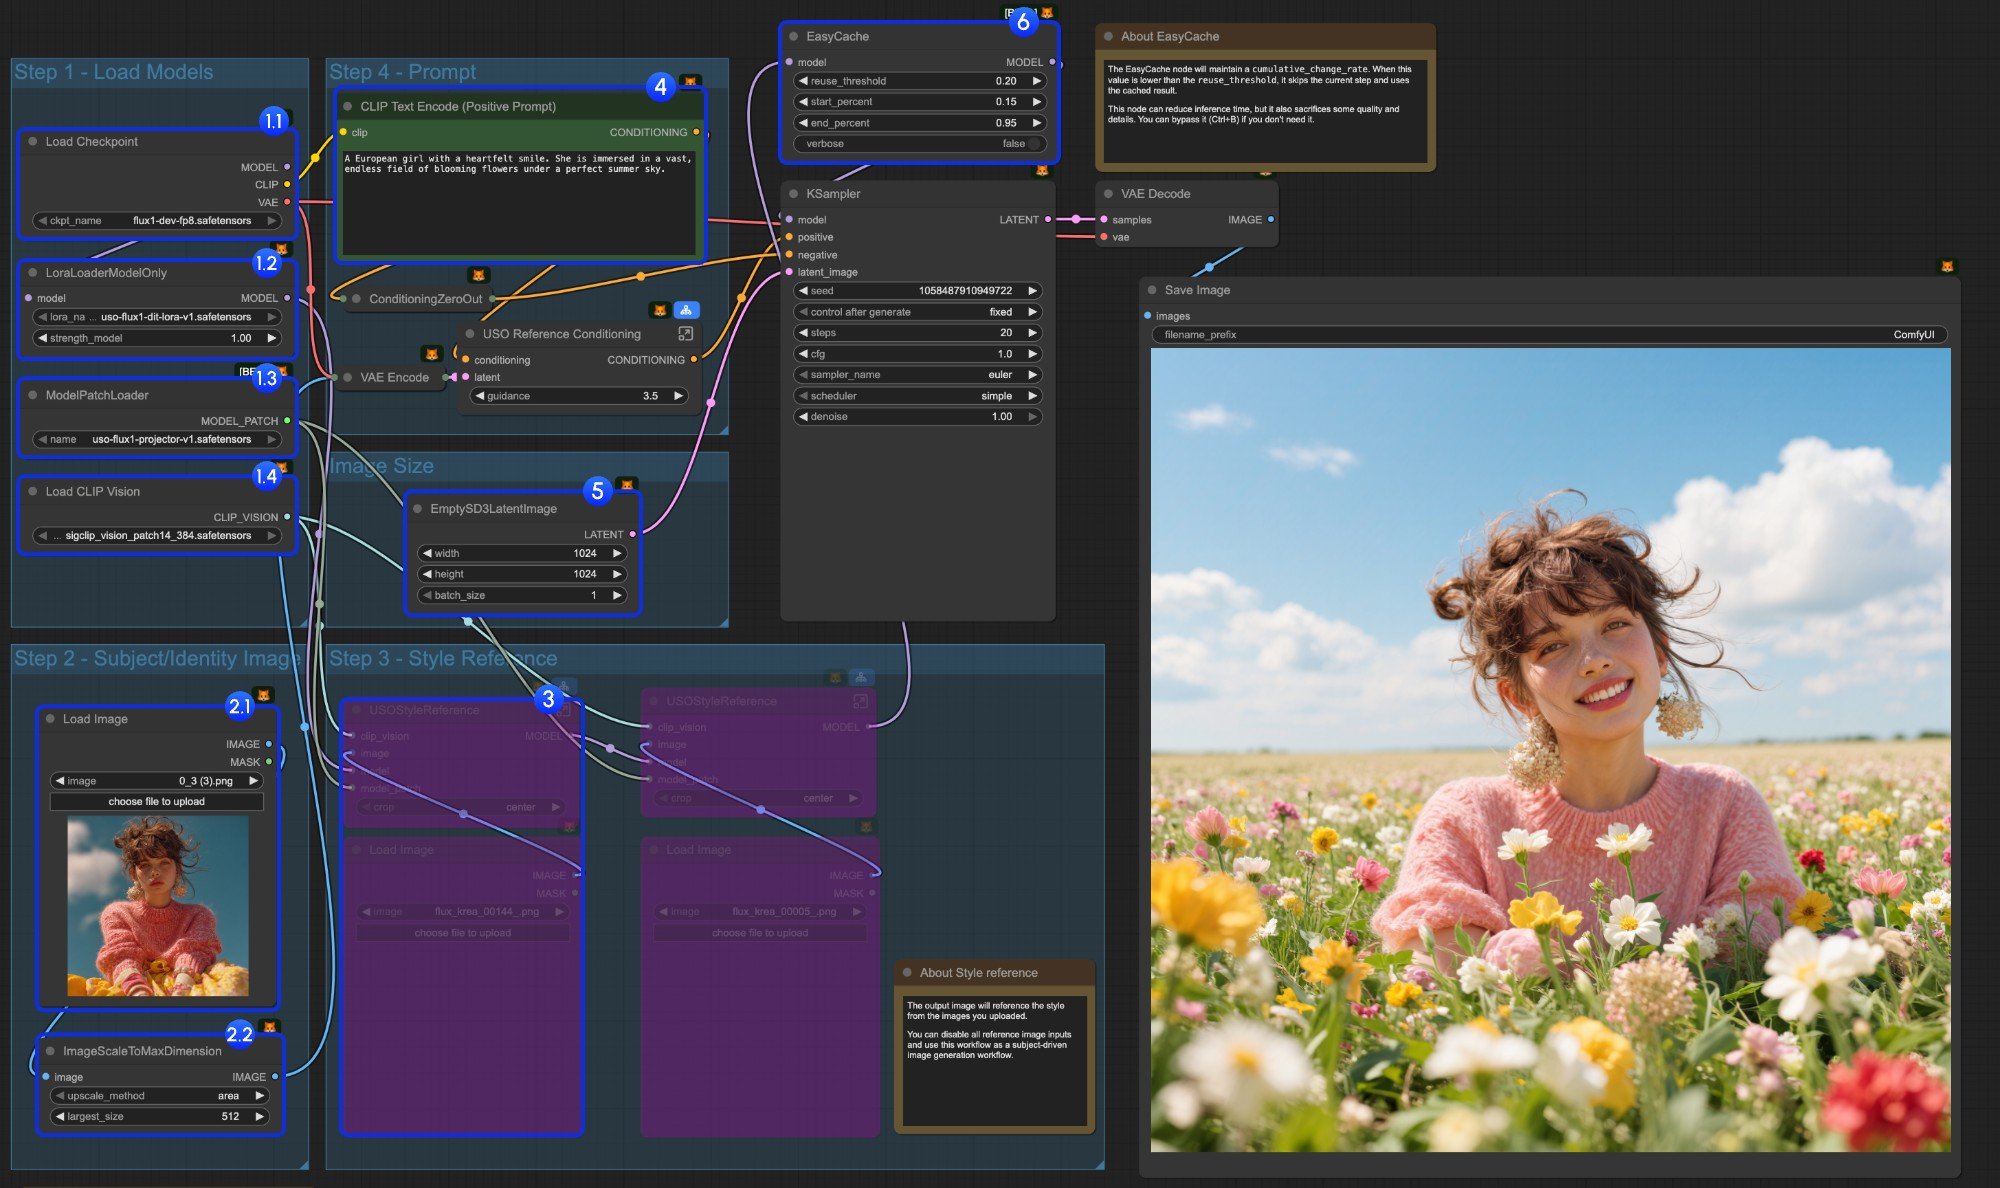 1. Load models:
* 1.1 Ensure the `Load Checkpoint` node has `flux1-dev-fp8.safetensors` loaded
* 1.2 Ensure the `LoraLoaderModelOnly` node has `dit_lora.safetensors` loaded
* 1.3 Ensure the `ModelPatchLoader` node has `projector.safetensors` loaded
* 1.4 Ensure the `Load CLIP Vision` node has `sigclip_vision_patch14_384.safetensors` loaded
2. Content Reference:
* 2.1 Click `Upload` to upload the input image we provided
* 2.2 The `ImageScaleToMaxDimension` node will scale your input image for content reference, 512px will keep more character features, but if you only use the character's head as input, the final output image often has issues like the character taking up too much space. Setting it to 1024px gives much better results.
3. In the example, we only use the `content reference` image input. If you want to use the `style reference` image input, you can use `Ctrl-B` to bypass the marked node group.
4. Write your prompt or keep default
5. Set the image size if you need
6. The EasyCache node is for inference acceleration, but it will also sacrifice some quality and details. You can bypass it (Ctrl+B) if you don't need to use it.
7. Click the `Run` button, or use the shortcut `Ctrl(Cmd) + Enter` to run the workflow
### 4. Additional Notes
1. Style reference only:
We also provide a workflow that only uses style reference in the same workflow we provided
1. Load models:
* 1.1 Ensure the `Load Checkpoint` node has `flux1-dev-fp8.safetensors` loaded
* 1.2 Ensure the `LoraLoaderModelOnly` node has `dit_lora.safetensors` loaded
* 1.3 Ensure the `ModelPatchLoader` node has `projector.safetensors` loaded
* 1.4 Ensure the `Load CLIP Vision` node has `sigclip_vision_patch14_384.safetensors` loaded
2. Content Reference:
* 2.1 Click `Upload` to upload the input image we provided
* 2.2 The `ImageScaleToMaxDimension` node will scale your input image for content reference, 512px will keep more character features, but if you only use the character's head as input, the final output image often has issues like the character taking up too much space. Setting it to 1024px gives much better results.
3. In the example, we only use the `content reference` image input. If you want to use the `style reference` image input, you can use `Ctrl-B` to bypass the marked node group.
4. Write your prompt or keep default
5. Set the image size if you need
6. The EasyCache node is for inference acceleration, but it will also sacrifice some quality and details. You can bypass it (Ctrl+B) if you don't need to use it.
7. Click the `Run` button, or use the shortcut `Ctrl(Cmd) + Enter` to run the workflow
### 4. Additional Notes
1. Style reference only:
We also provide a workflow that only uses style reference in the same workflow we provided
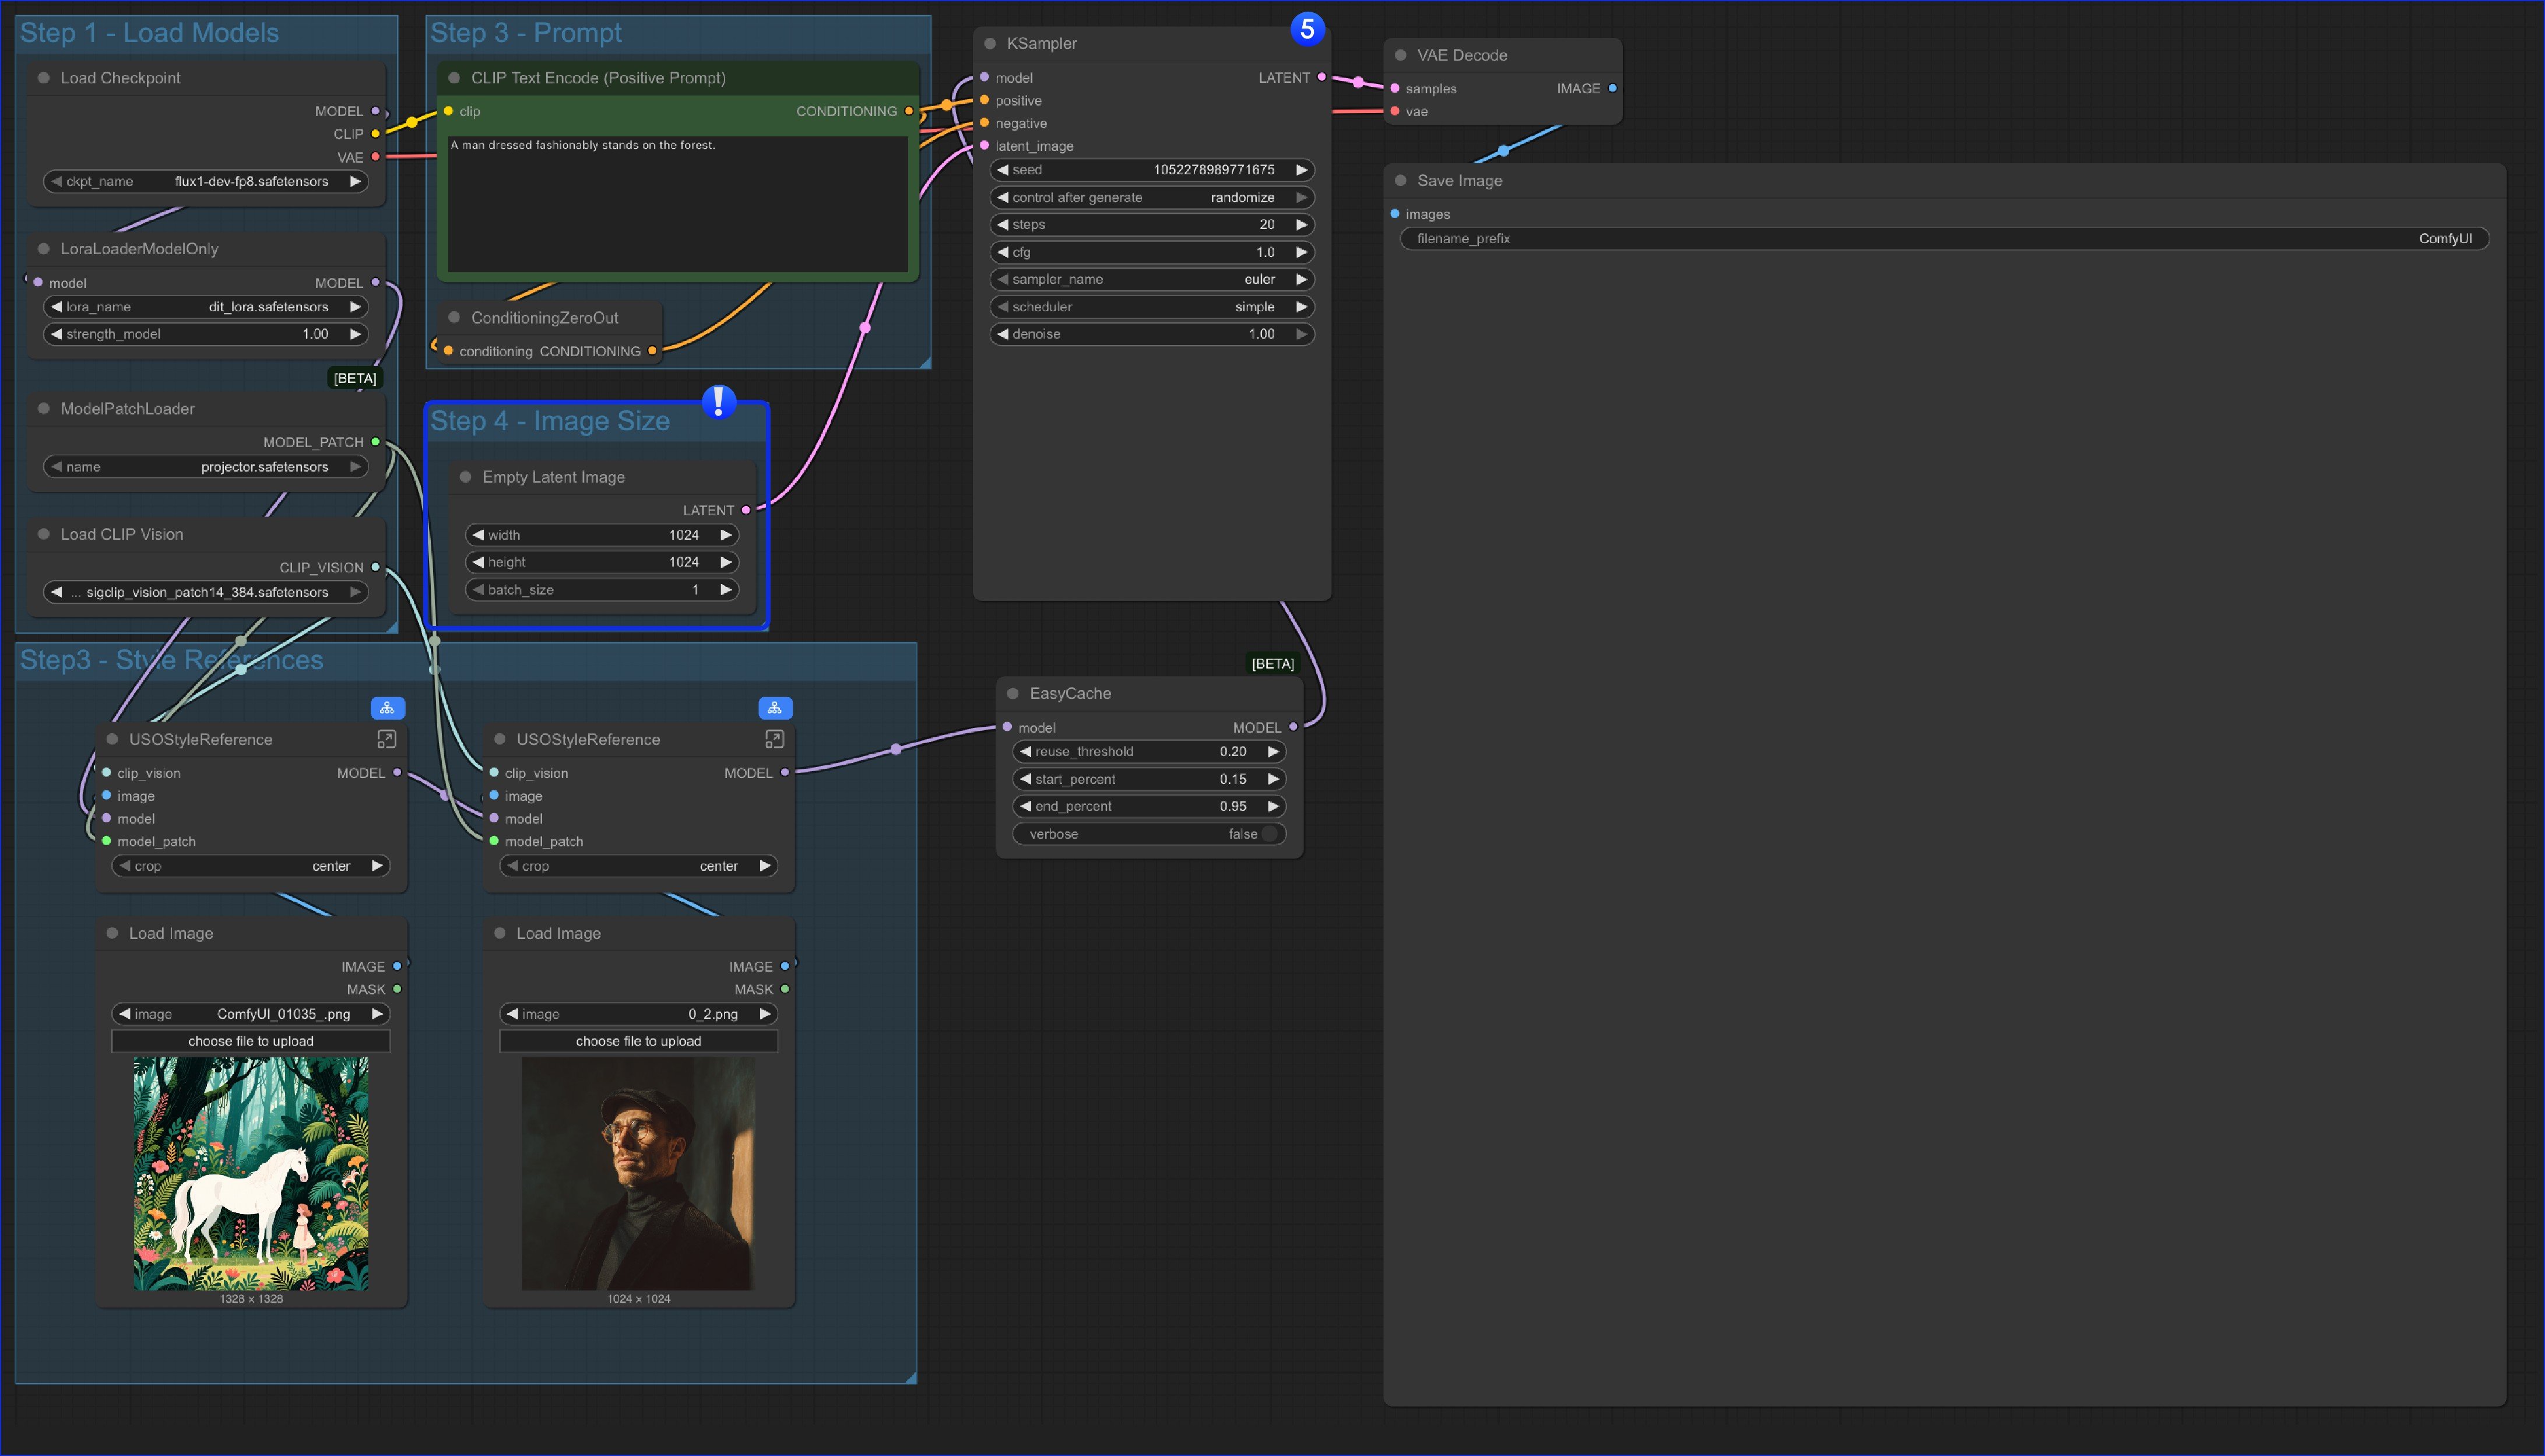 The only different is we replaced the `content reference` node and only use an `Empty Latent Image` node.
2. You can also bypass whole `Style Reference` group and use the workflow as a text to image workflow, which means this workflow has 4 variations
* Only use content (subject) reference
* Only use style reference
* Mixed content and style reference
* As a text to image workflow
The only different is we replaced the `content reference` node and only use an `Empty Latent Image` node.
2. You can also bypass whole `Style Reference` group and use the workflow as a text to image workflow, which means this workflow has 4 variations
* Only use content (subject) reference
* Only use style reference
* Mixed content and style reference
* As a text to image workflow